
At Over, we’ve recently translated our app into 12 new languages. This meant that our release process started to get a bit more tedious as more steps were introduced into making a new release for the Google Play Store. We were starting to feel the fatigue of manually completing the exact same steps for every release.
My goal was to make this process as seamless as possible for the engineer on release duty. I decided to turn to using Github Actions to automate as much of the process as possible. In this blog post, I’ll explain different parts of our process and show you how I setup Github Actions to achieve what we needed to.
Our Release Process
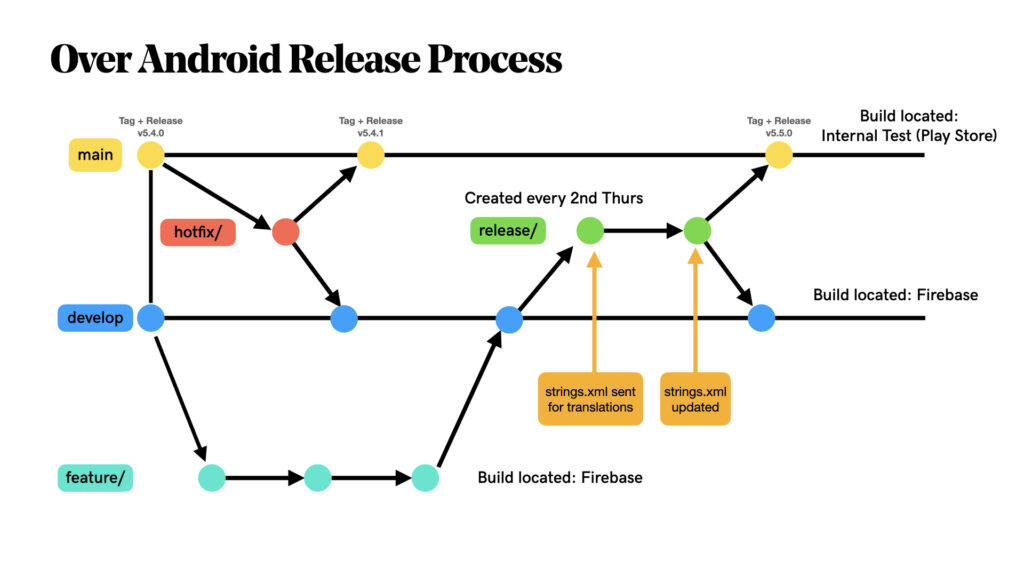
We use Git Flow for our release process, which means when we are ready to release, we create a release/v5.4.0 branch from develop. We would manually create this branch, change the version code and version name, push the changes and create two PRs for this (One for the merge into main and one for the merge back into develop). Once a release was merged, we needed to do some release note creation, tagging on Github and notifying the team on Slack what the latest release contains.
This process, although cumbersome, wasn’t too unpleasant to manage manually. Then a new requirement was added to our process: Submit the strings.xml file for translation when a new release is made. We also needed automation when the translations were received back from the translation system.
This diagram below describes Git Flow (adapted from here), with our added step of submitting translations for the application:
Automating more of our release process 🤖
Although we had automatic builds set up to submit releases to Google Play and Firebase, a large chunk of our release process was still a manual process. We used Github Actions to automate more of this.
We now have three workflows setup on Github actions:
- Starting a release and submitting
strings.xmlfor translation. - Getting translations back from translators.
- Tagging a release on Github and notifying a slack channel.
Note: We aren’t automating the actual builds on Github Actions yet, the different builds happen on a separate build server when pushes to the relevant branches are created, I won’t be covering those configs in this post.
Starting a release 🚝
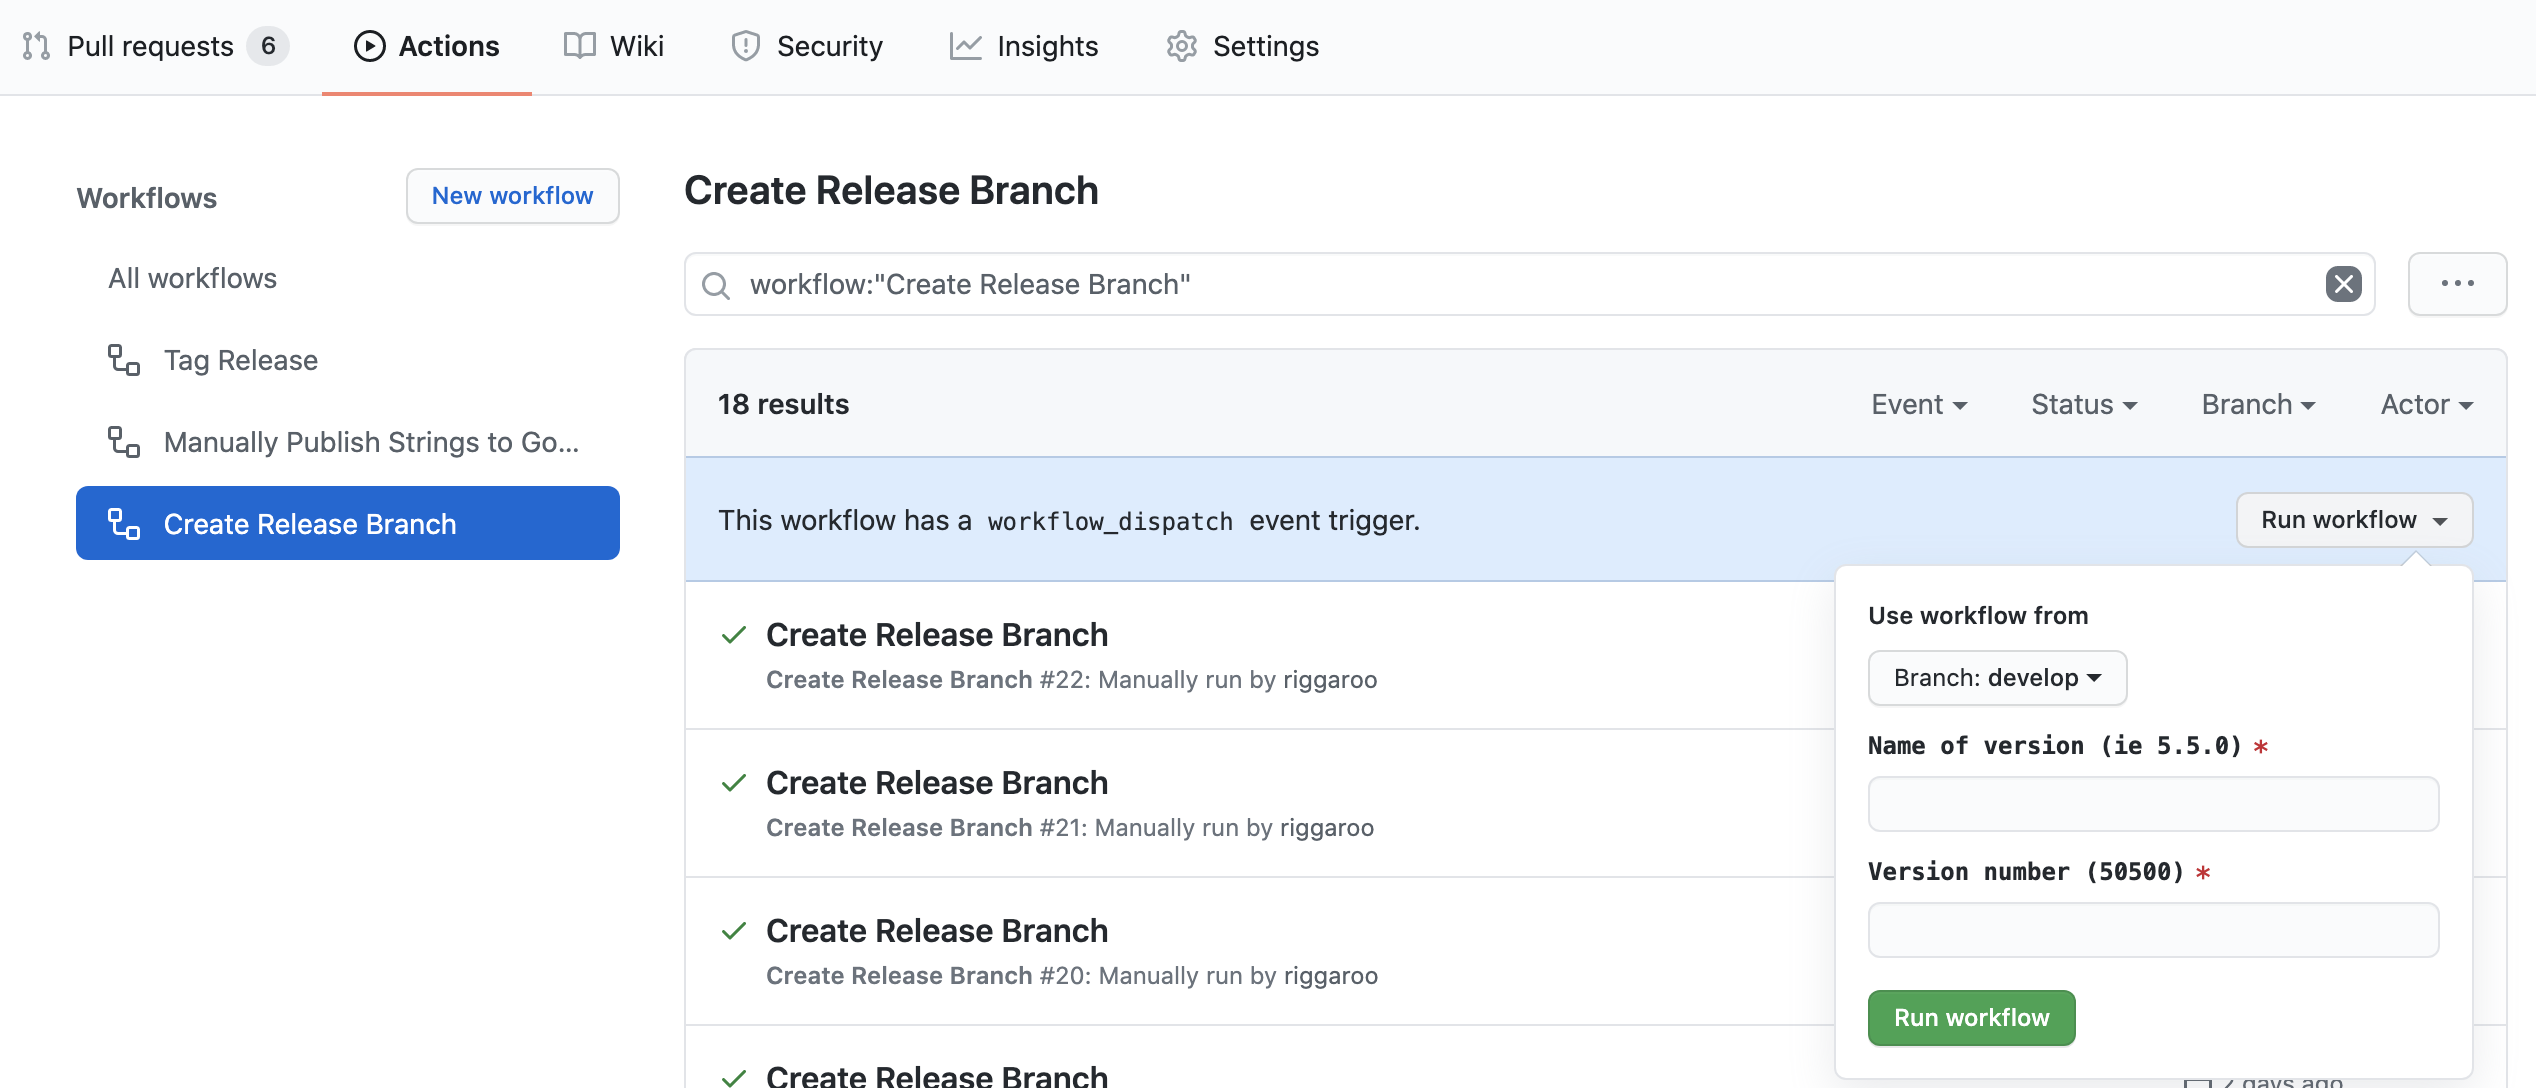
The first workflow I created is a manual trigger to create the release branch and submit the strings.xml for translation.
Using the workflow_dispatch trigger, this offers a UI in the Github Actions tab, to enter in some user input. For our release workflow, I added versionName and versionCode to be entered in by the release engineer.
We also introduced using a CHANGELOG.md file for documenting the new features and release notes that’ll be generated at the end of the process, so we no longer need to cobble together release notes when we make a new release.
This is the create_release_branch.yml file, checked into git at the following location .github/workflows/create_release_branch.yml(you can call your yml anything, but they need to be located in .github/workflows/ folder in order for Github to find them):
Using the workflow_dispatch trigger, this is a manual trigger that allows for user input.
This release workflow does the following steps:
- Check out code from app repo.
- Create new release branch named
release/v{versionName} - Change the version name and version code of release.
- Update the changelog using this action.
- Commit and push changelog changes and version name changes to the branch.
- Copy
strings.xmlfile to the other repository that we use for translations using this action. This action requires setting up a PAT (Personal Access Token) and putting the variable in the “Settings” -> “Secrets” . - Create two PRs, one into
mainand one intodevelop. This triggers our build server to see if these builds pass.
After this point, the release branch will be waiting for translations before we merge the PRs.
Now to actually run this Action: Log onto Github and select “Actions” tab, click on the “Create Release Branch”, there is a little “Run workflow” button that we can click to trigger this workflow with our inputs.
Getting translations back from translators 🌎
We have a separate repository where our translations for the application live, the new translations are submitted to us via new commits on that repository. The repository also lives on Github, so I created a new workflow trigger on that repository to process the translations.
This workflow does the following steps:
- Check out translations repo (
android-i18n) and checkout app repo (android-app). - On
android-apprepo, switch to the latest release branch. - On
android-i18nrepo, runrenameall.shscript. This script changes the folder names from the translation system names to android resource folder names (ie fromdetovalues-de). - Copy the renamed folders (with their string changes) to the
android-apprepo from theandroid-i18nrepo. - Create Pull Request into release branch on the main
android-apprepository. - Notify on slack that the new translation PR is available.
This workflow really helped ease some of the pain of manual string copying back and forth between repositories.
Tagging a release 🔖
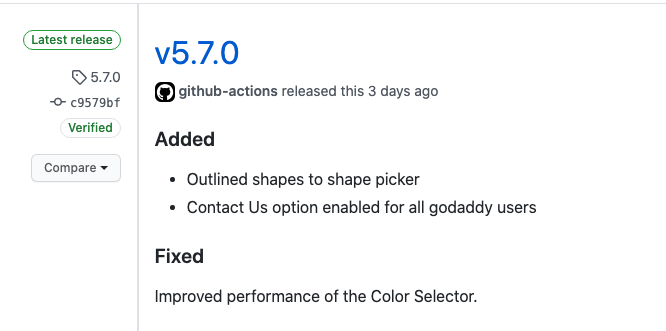
Once a release has been merged into our main branch, we had the next manual step of creating a release on Github, copying release notes from CHANGELOG.md and tagging it. We would also need to at this point, notify a certain slack channel of the new release build. As you can tell, this was also a perfect candidate for automation since it was the same process every single time.
This is the workflow for tagging a release, getting the CHANGELOG.md release notes, and notifying the relevant slack channel:
This workflow runs when a new push has happened on the main branch. It does the following:
- Check out code.
- Get the version name from
app_versions.gradlefile. Set an environment variable for use in later steps. - Extract release notes from the
CHANGELOG.mdfile, using this action. - Create a Github Release with the tag_name set to the
VERSION_NAMEextracted from step 2. - Notify slack channel with that a new version is going to be published on Google Play with the release notes from
CHANGELOG.md.
Summary
I found Github Actions to be simple enough to set up and get started. The part that convinced me to use Github Actions was the amount of existing Github Actions that you can leverage really easily by just using the uses tag. For instance, finding actions that deal with CHANGELOG.md files, creating PRs and copying files, really helped ease the process of creating these new automations easier.
Github Actions are really powerful, ActionsFlow is a great example of what can be built on-top of Github Actions. It is basically a Zapier/IFTTT replacement, all running off Github Actions.
I can’t wait to automate more of my life with Github Actions. What have you built with Github actions? Let me know on Twitter — @riggaroo
References: