

Android Studio 4.0 has been released in the stable channel! 🥳 What does this mean for us? Well, the new Motion Editor is in Android Studio 4.0 and if you are someone who prefers to use the stable version of tooling, this is probably your first look at the Motion Editor.
In this blog post, we are going to have a look at the different aspects of the new Motion Editor and how you can create a MotionLayout animation within the Editor.
Creating a new MotionLayout Animation
MotionLayout itself is part of the ConstraintLayout beta, so to ensure you have the feature, make sure your ConstraintLayout dependency is on the following (or higher):
implementation 'androidx.constraintlayout:constraintlayout:2.0.0-beta6'
To create a new MotionLayout animation, head to your layout folder and create a new Layout Resource File. Give it a meaningful name and select MotionLayout as the root layout.

Once the file is created, you will see the MotionLayout root element requires a layoutDescription tag to be set on it. This is the MotionScene file that should be linked to the layout.
What is a MotionScene? 🎬
A MotionScene object is the description for how the MotionLayout should animate its components. We will define this MotionScene in another XML file, in the xml directory in our res folder. It contains the definitions for the different layout states that the layout can be in (ConstraintSet) and the mechanism for transforming between these states (Transition).
To add a new MotionScene file, you can click on the red light bulb that appears next to the MotionLayout tag and then click the action to “Generate MotionScene file”:

This will then automatically create a new MotionScene XML file in the xml directory. The default MotionScene file looks as follows:
<?xml version="1.0" encoding="utf-8"?>
<MotionScene xmlns:android="http://schemas.android.com/apk/res/android"
    xmlns:app="http://schemas.android.com/apk/res-auto">

    <ConstraintSet android:id="@+id/start">
        <Constraint android:id="@+id/widget" />
    </ConstraintSet>

    <ConstraintSet android:id="@+id/end">
        <Constraint android:id="@id/widget" />
    </ConstraintSet>

    <Transition
        app:constraintSetEnd="@id/end"
        app:constraintSetStart="@+id/start" />
</MotionScene>
You will need to remove the Constraint that references widget from the generated MotionScene file, since our new layout doesn’t have that widget inside it. Our MotionLayout layout file looks as follows (Note: You may have to add the appprefix to the layoutDescription tag):
<?xml version="1.0" encoding="utf-8"?>
<androidx.constraintlayout.motion.widget.MotionLayout
    xmlns:android="http://schemas.android.com/apk/res/android"
    android:layout_width="match_parent"
    android:layout_height="match_parent"
    xmlns:app="http://schemas.android.com/apk/res-auto"
    app:layoutDescription="@xml/motion_layout_demo_scene">

</androidx.constraintlayout.motion.widget.MotionLayout>
Now at this point we have our layout setup, so we can go ahead and start working in the “Design” view.

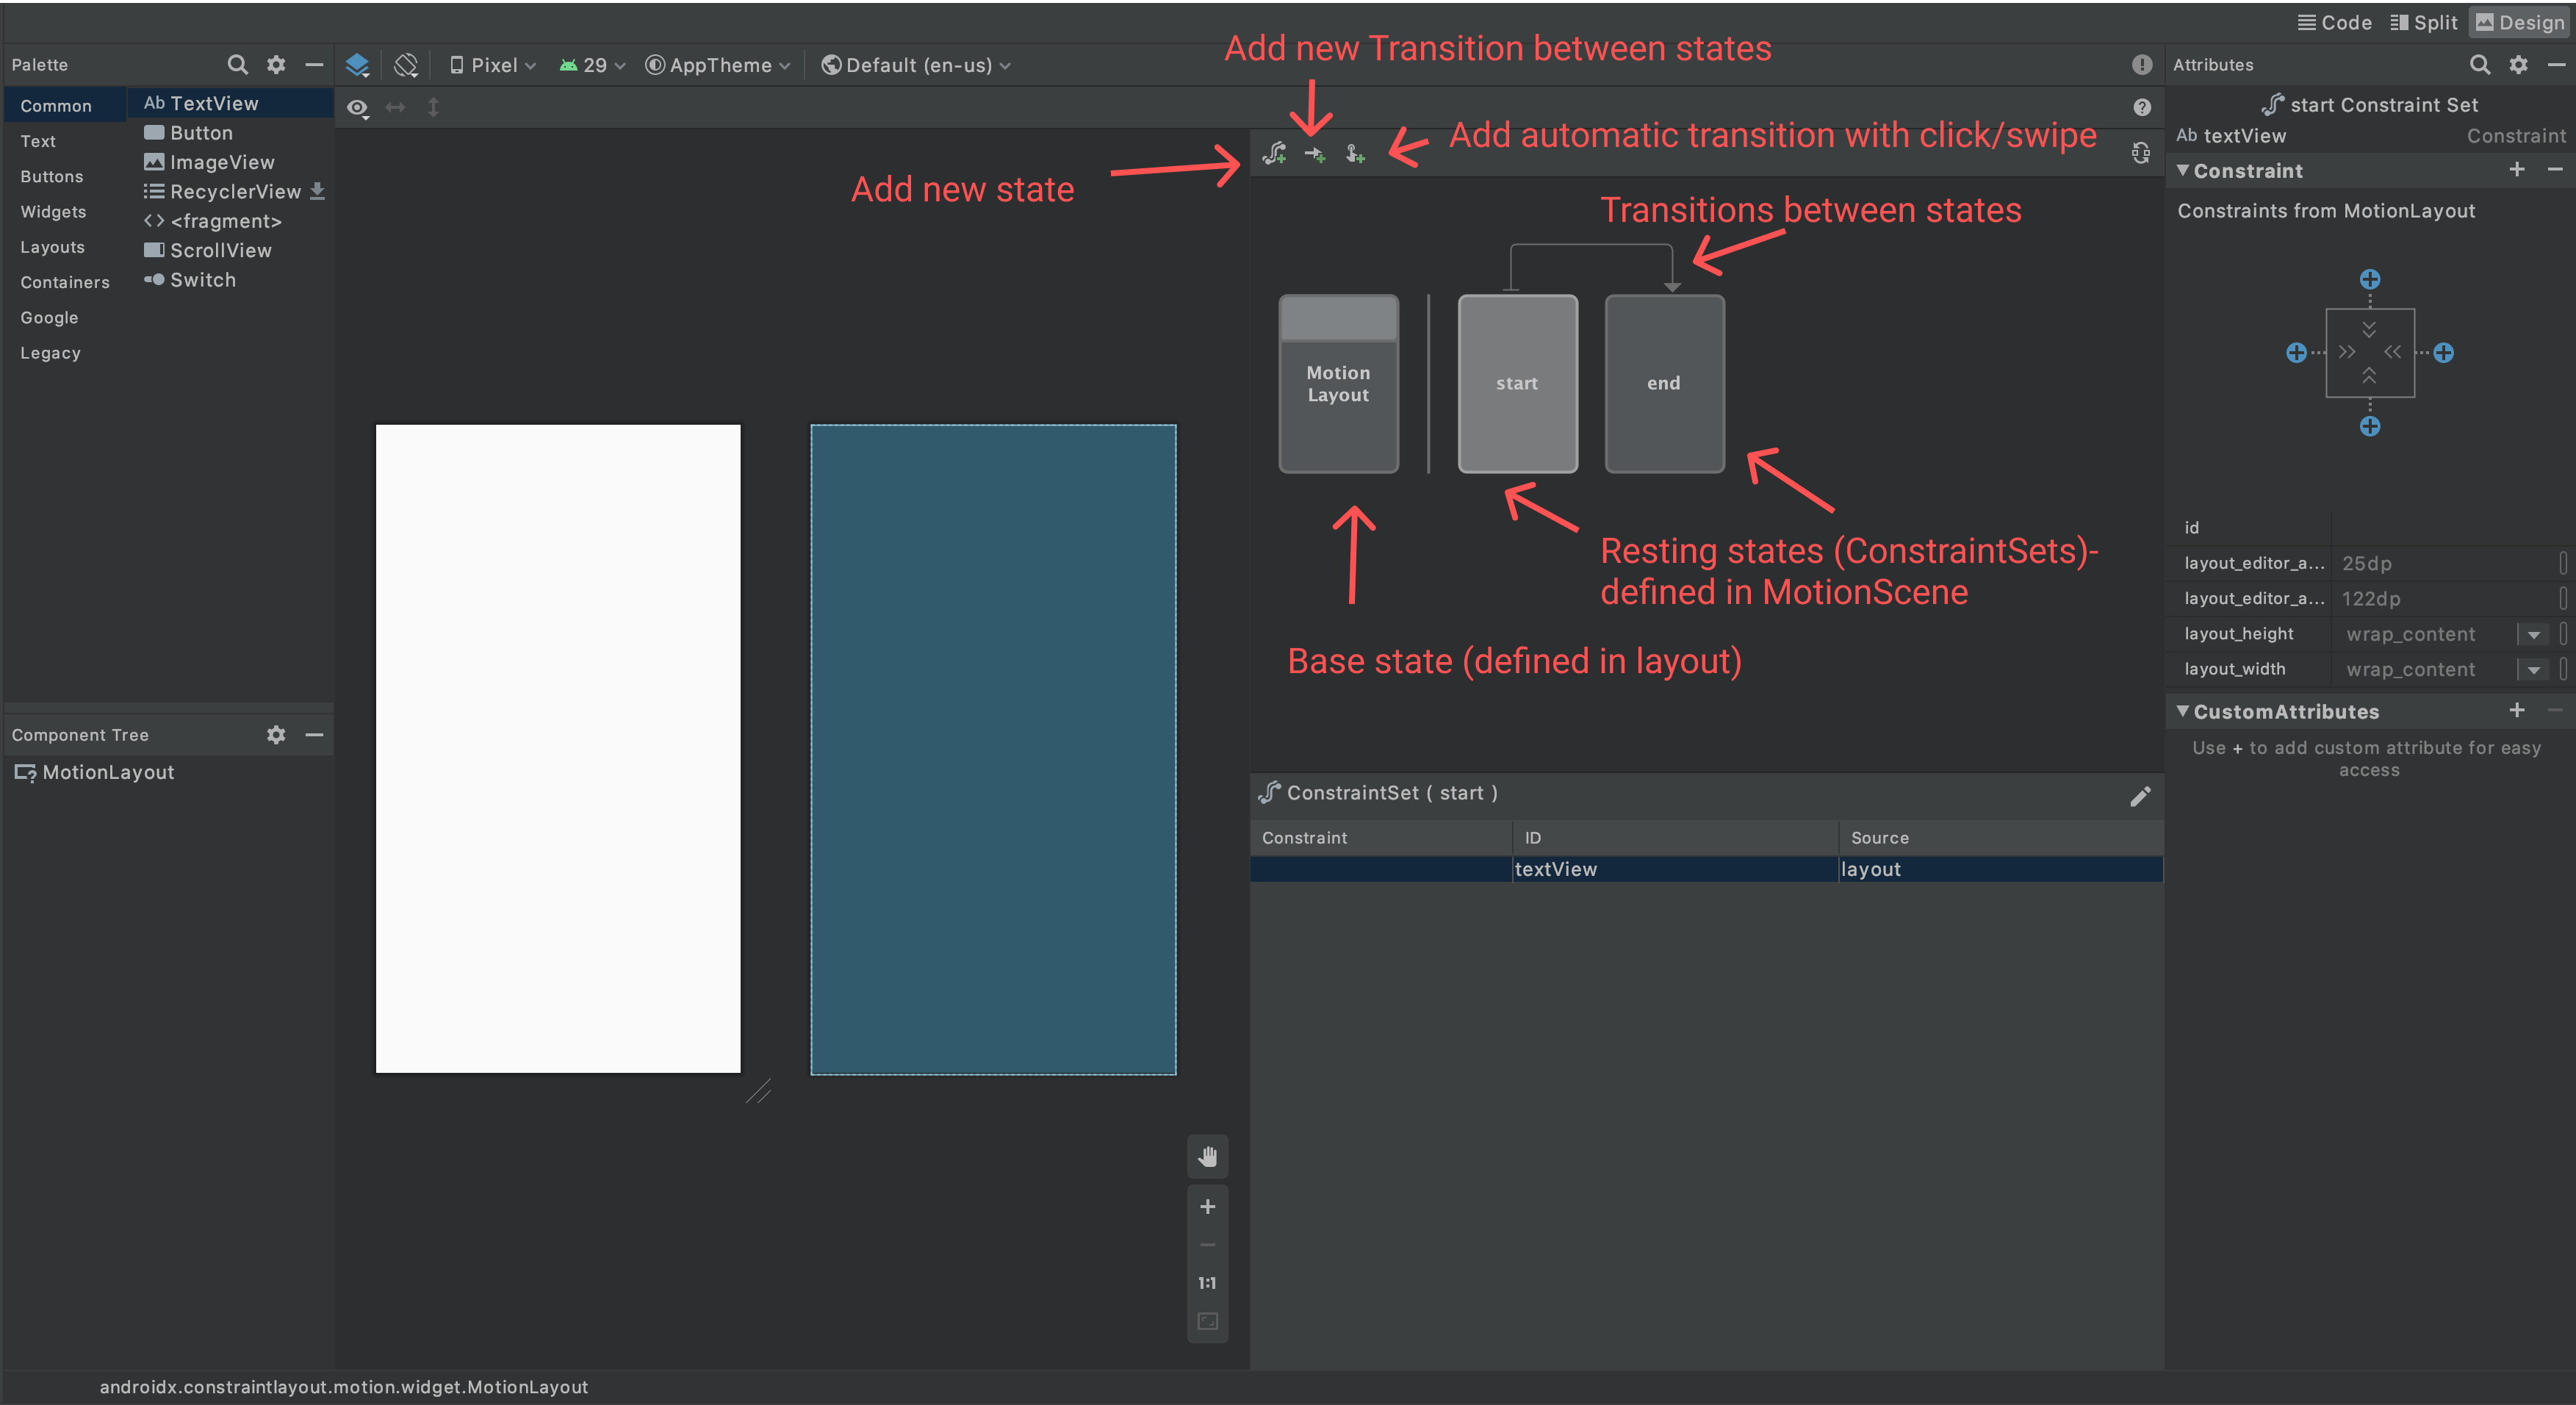
Let’s take a look at the new controls that’ll appear when a MotionLayout object is selected in the Component Tree.
There is a new section with the different resting states, the transitions between them and new buttons to add these kinds of elements.
MotionLayout resting states (ConstraintSet) 🛌
The intention with MotionLayout is that the whole layout has different states that it can take on and animate between. These are defined with the ConstraintSet tag. I like to think of them as “resting” states, since they are where the layout will end up resting after the animation has finished.
When you click on any of the states, i.e. the “base state”, start or end state, the editor updates to show you what that state looks like. Generally, when adding new views and setting the initial state of the view, you want to make sure you have the “base state” (The one that says “Motion Layout”) selected.
To have different constraints set in the different states, you would select the relevant state that you want to edit and change the constraints, as if you are building a normal layout with ConstraintLayout.
Let’s add a button to our layout. Make sure the “base state” is selected, and then drag in a new button from the Palette selection. We then give it top and start constraints.
Now select the end state that we have defined. We can now edit the button’s constraints to be constrained to the bottom and end of the screen. When we toggle between the different states, we can see that the button is at the top in the start state and at the bottom in the end state.
Now we have our two states with different constraints, let’s see how we can add a new state if we wanted one.
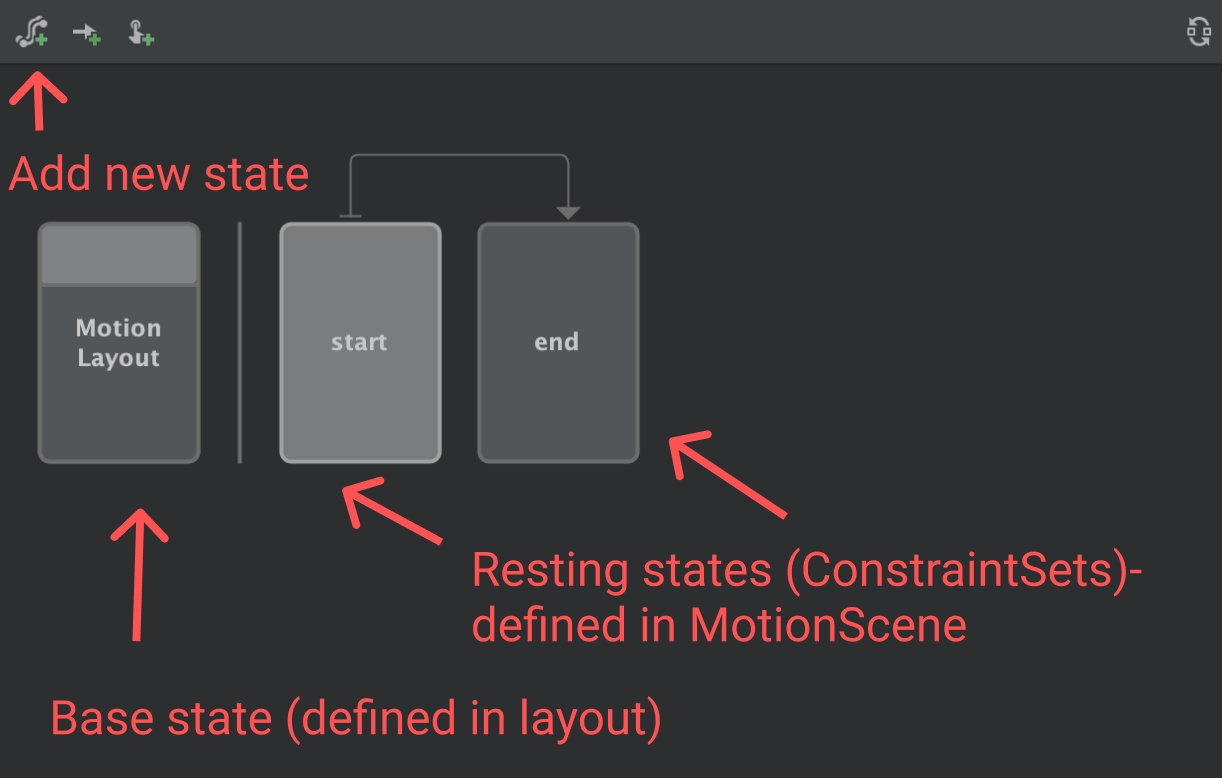
Adding new Motion Layout States ➕
To add a new resting state, click on the first button above the states:

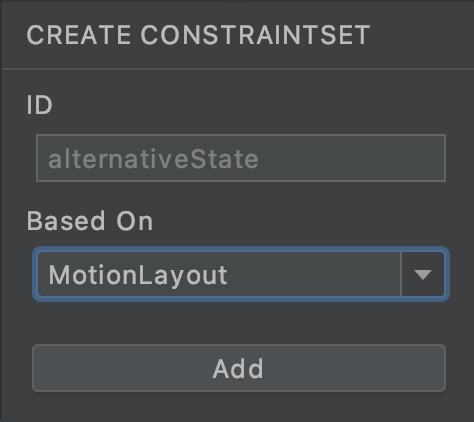
This will prompt you to enter a name for the state and if it should be based on any other state. What this means is that it will take all the constraints set in the state you base it on. If you just want one or two things different from another state, you can set a base state to inherit from.
By default, all states inherit constraints from the base state of MotionLayout (i.e. The constraints that are set in the layout file). This is why we didn’t need to set constraints for the startstate, it just inherited the state from the MotionLayout itself.
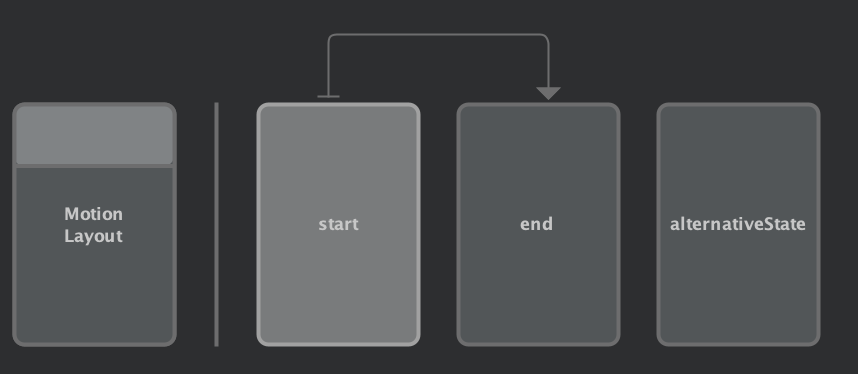
The new state will now appear in the list inside the editor. Similar to the above actions of adding constraints per state, we can select this state and add as many constraints as we would like for this state.
Transitions between states 🔁
We have our different states set up and we know how we want this animation to run. We want our button to animate from the top left corner to the bottom right. But how do we make this happen?
With Transitions, we can specify which state is the start state and which is the end state. Running the transition between them will automatically animate between the different ConstraintSets that have been defined in each state. Like magic! Let’s take a look.
Playing MotionLayout animations in Android Studio ⏯
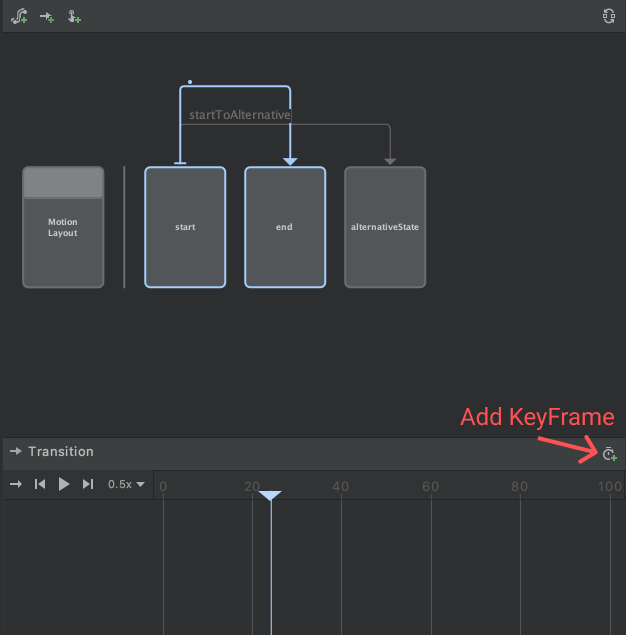
If you recall from the beginning of this article, the lines with arrows above the states represent the transitions between them. When you click on the line, the editor will show you the transition information below the states and you will be able to play the animation between those two states.
You can slow down or speed up the animation by clicking on the 1.0x button near the play button and choosing a different speed option.
Adding new Transitions
Like adding a new state (ConstraintSet), we can add as many Transitions between states as we want. To do this, click on the “Add transition” button:

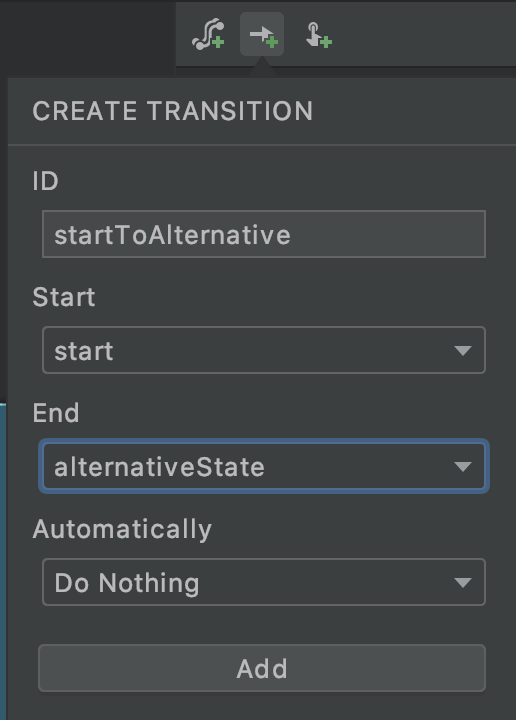
We can then specify the id of the transition, which state to start with and which should be the end state of the transition.
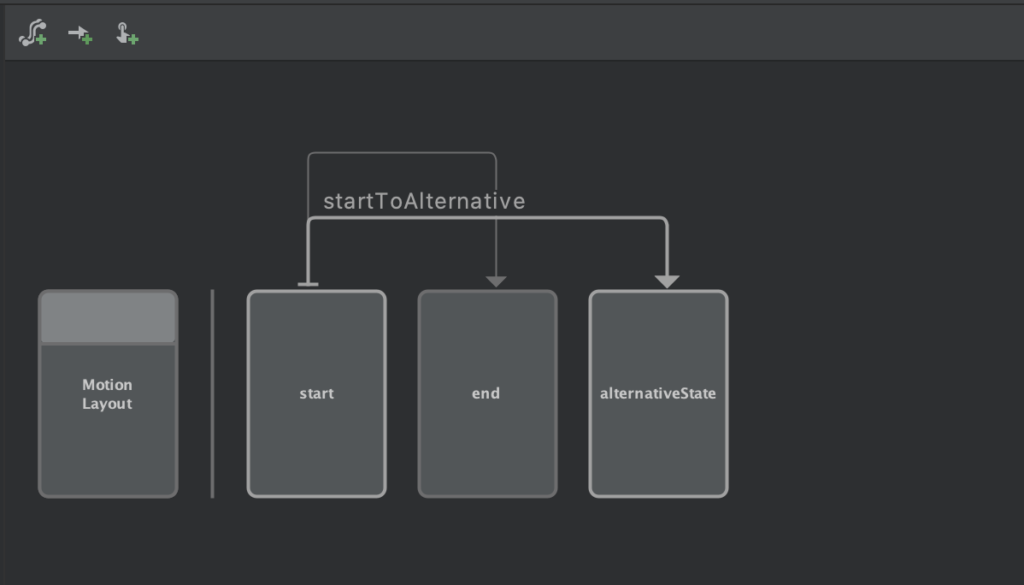
After defining the new transition, it will appear in the Motion Editor UI. Clicking on the transition and playing it, we can see how the transition will animate between these two defined states.
Automatic transition of MotionLayout on Button Click
We’ve created a basic animation with the Motion Editor and we are happy with our transition, but when we run the layout on our device nothing happens. We need to set up some automatic transitions when a button is clicked. Luckily we can do that from the editor too.
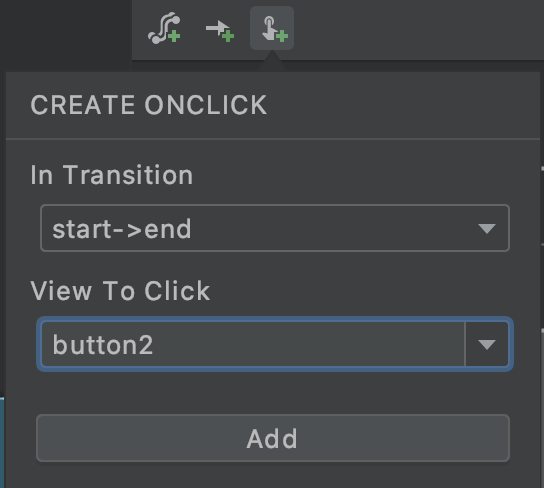
To add an automatic transition when the button is clicked, select the 3rd button to add a new listener:

We select “Click listener” since we want to add it on the button click. Then we select which transition should run and which view the click listener should be added to:
Now when you run the application on your device and click on the button, it will automatically transition to the end state that we defined.
What if we wanted to get a bit fancier with our animation? For instance, we want the button to start off fully transparent and by 27% of the animation, it should be fully visible.
To do this, we need to look at using KeyFrames to create even more dynamic animations.
Adding a KeyFrame to a transition
We first need to set the start state to have an alpha value of 0.0 for the button. Then the end state should have an alpha of 1.0, since it needs to be fully visible at the end.
Now that we have the ConstraintSets defining the alpha for the start and end states, we need to define the KeyFrame at 27% to set the alpha of the button to 1.0. To do that, click on the KeyFrames button that appears when selecting a transition in the Motion Editor.
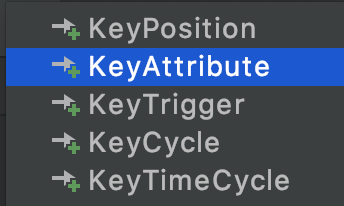
We then select “KeyAttribute” when presented with the different options. KeyAttribute allows us to set an attribute on the view at a certain position in the animation (Attributes such as alpha, rotation, scale or elevation).
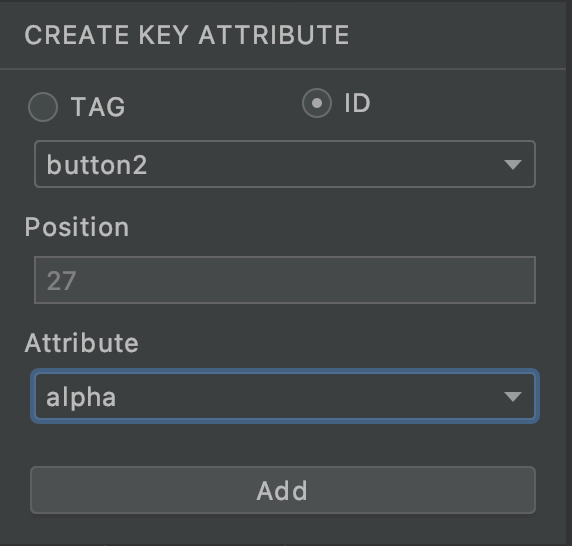
Now we choose the target view, the position in the animation (Out of 100%) and the attribute that we want this to target. We set the position to 27 and we target the alpha attribute.
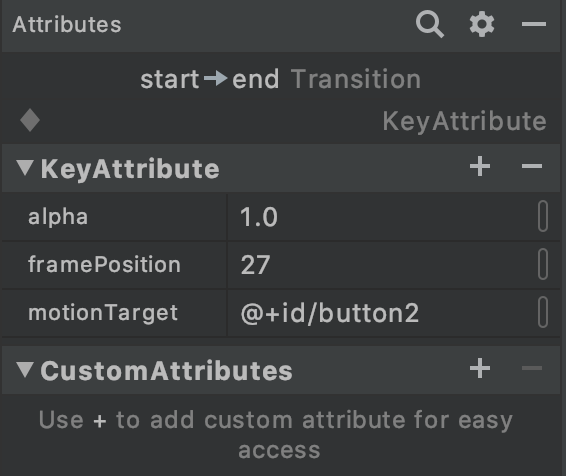
Now you will see the KeyFrame item get added to the “Transition list”.

Selecting the item and opening the “Attributes” panel on the side, we can see the KeyAttribute defines the alpha, motionTarget and the framePosition. We want to change this alpha value to be 1.0 now, since we want the button fully visible at 27%.
If we scrub the “animation position tracker” in the editor we can visibly see how this animation progresses from 0 to 1 during the 0–27% of the animation and from 27% onwards it is fully opaque.
There are plenty of other KeyFrame options available to you as seen in the first drop down list. If you want to change other properties during the animation, you can use KeyPosition, KeyTrigger, KeyCycle or KeyTimeCycle to achieve different effects.
KeyFrames are best for when you want a part of the animation to be different or to change during the transition between start and end state.
Wrapping up 🎁
The new Motion Editor in Android Studio makes working with MotionLayout so much easier than before. I am really enjoying working with it and previewing my animations inside Android Studio without needing to run it on a device.
I would love to see what you build with MotionLayout and the new Motion Editor, so please show me what you have made on Twitter @riggaroo.
Till next time!
References
- Check out my “Getting Started with MotionLayout” video on YouTube
- MotionLayout documentation